First You Draw a Circle
Many drawings require a perfect circle shape equally an outline. While a compass tin can assistance u.s.a. draw a perfect circumvolve rapidly and easily, what happens when you don't take access to a compass?
Learning how to draw a perfect circle without the assistance of a tool is essential because information technology'due south the outline of various characters, animals, and even objects.
To arrive a lot easier for you, we have created a stride-by-step process on how to draw a circle, summarized in 9 easy steps and illustrations.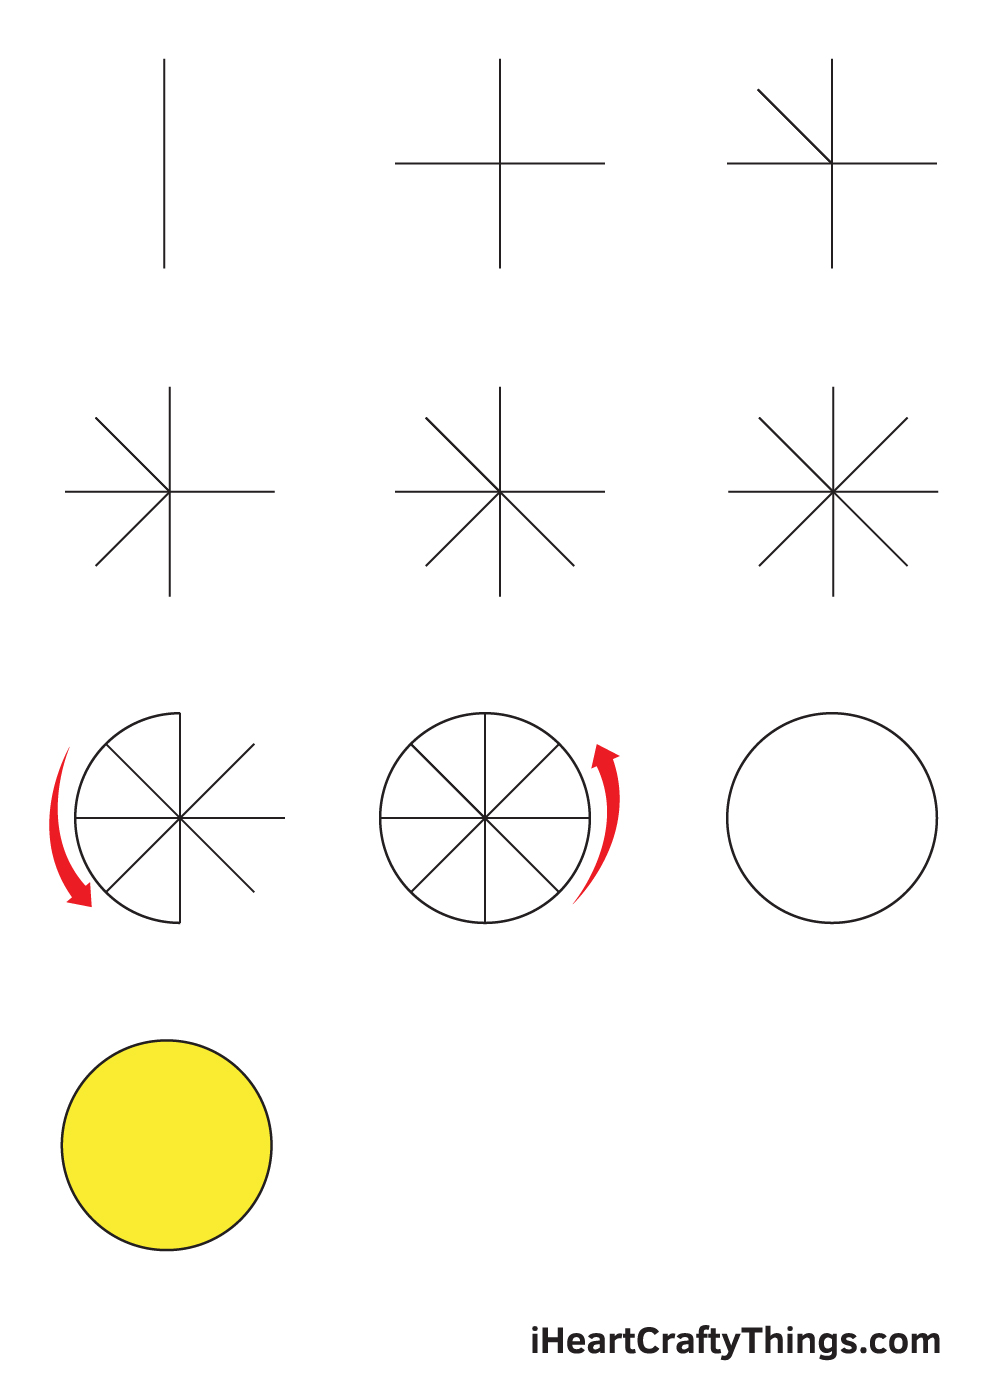
All yous need is a piece of newspaper and your favorite pencil and yous're all set up to describe a perfect circle.
Follow this guide and you may be surprised to discover that drawing a perfect circle isn't as difficult as y'all call back!
Have fun and unleash your inner creativity!
What'south in this Blog Post
- How to Draw a Circumvolve — Let'southward go started!
- Step 1
- Step 2 — Draw an Intersecting Horizontal and Vertical Line
- Step 3 — Depict a Diagonal Line on the Upper Left Side
- Step 4 — Draw a Diagonal Line on the Lower Left Side
- Step 5 — Draw a Diagonal Line on the Lower Correct Side
- Step vi — Describe a Diagonal Line on the Upper Right Side
- Pace vii — Trace an Outline of the Circle on the Left Side
- Step 8 — Afterwards, Consummate the Outline of the Circumvolve
- Step 9 — Now, Erase the Lines to Refine the Circle Shape
- Your Circle Cartoon is Consummate!
How to Draw a Circle — Let's become started!
Step ane
Start by cartoon a straight vertical line in the middle of your paper. The length of the line should be as alpine as you desire your circle shape to be.
Likewise, experience free to use a ruler if you need assistance in cartoon straight lines quickly and easily.
Remember, use low-cal strokes when cartoon these lines. Avoid pressing downwardly too hard with your pencil and so you can easily remove these lines when you no longer demand them later on.
Step 2 — Depict an Intersecting Horizontal and Vertical Line
Draw a horizontal line intersecting with the vertical line that we drew in the previous step. These ii lines encompass the length and the width of the circle shape.
At this point, these 2 lines should now be forming a cross pattern.
Pace 3 — Draw a Diagonal Line on the Upper Left Side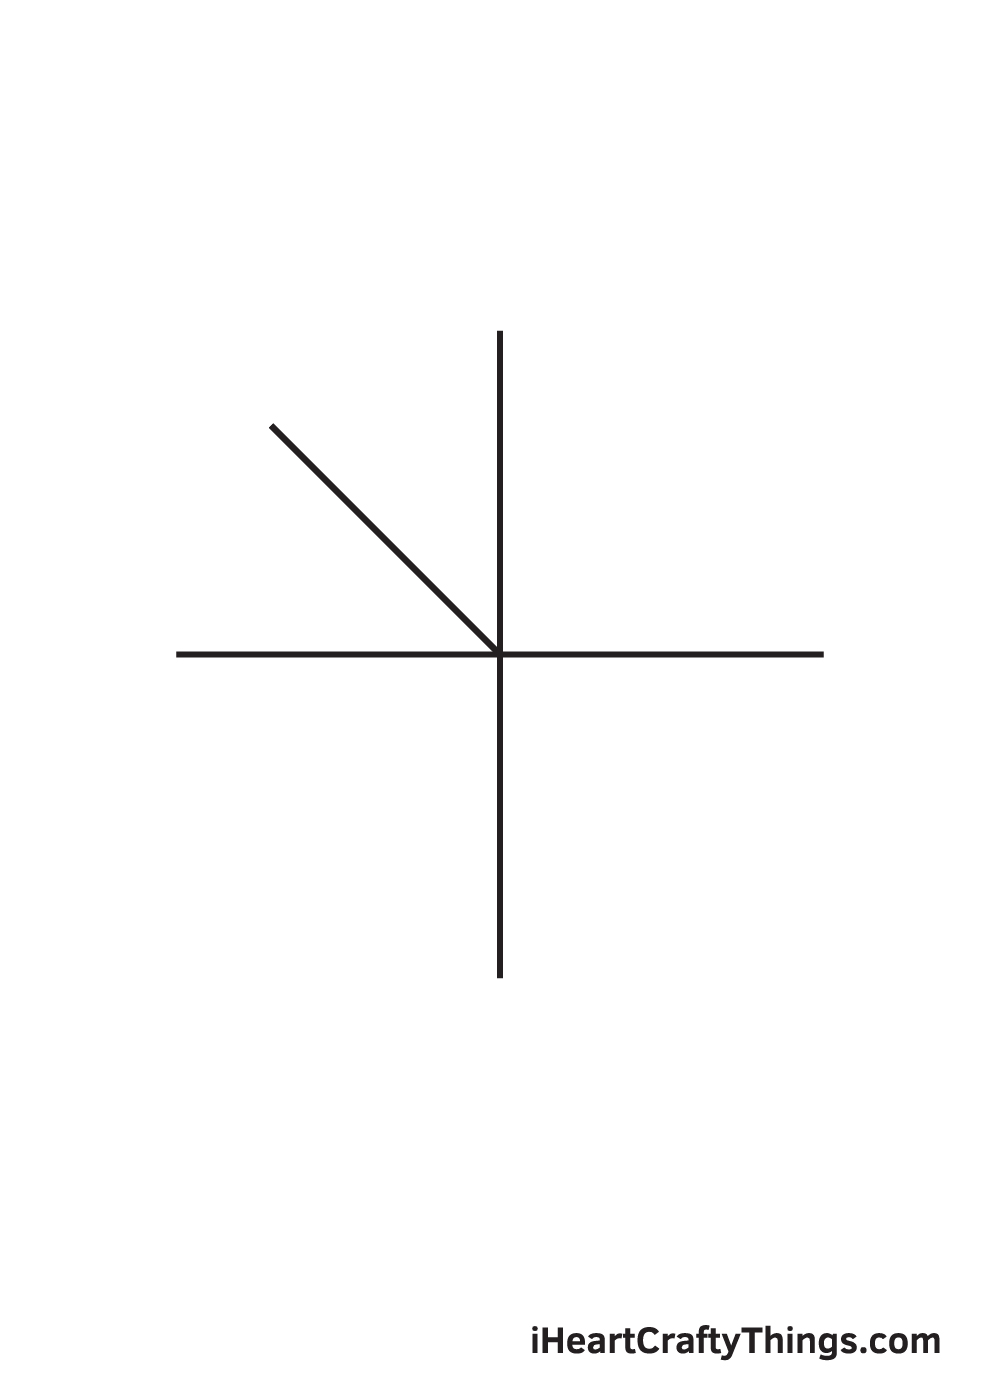
Draw a diagonal line in between the top vertical line and the horizontal line on the left side. The length of the diagonal should exist half of the vertical or horizontal line's length.
Pace iv — Draw a Diagonal Line on the Lower Left Side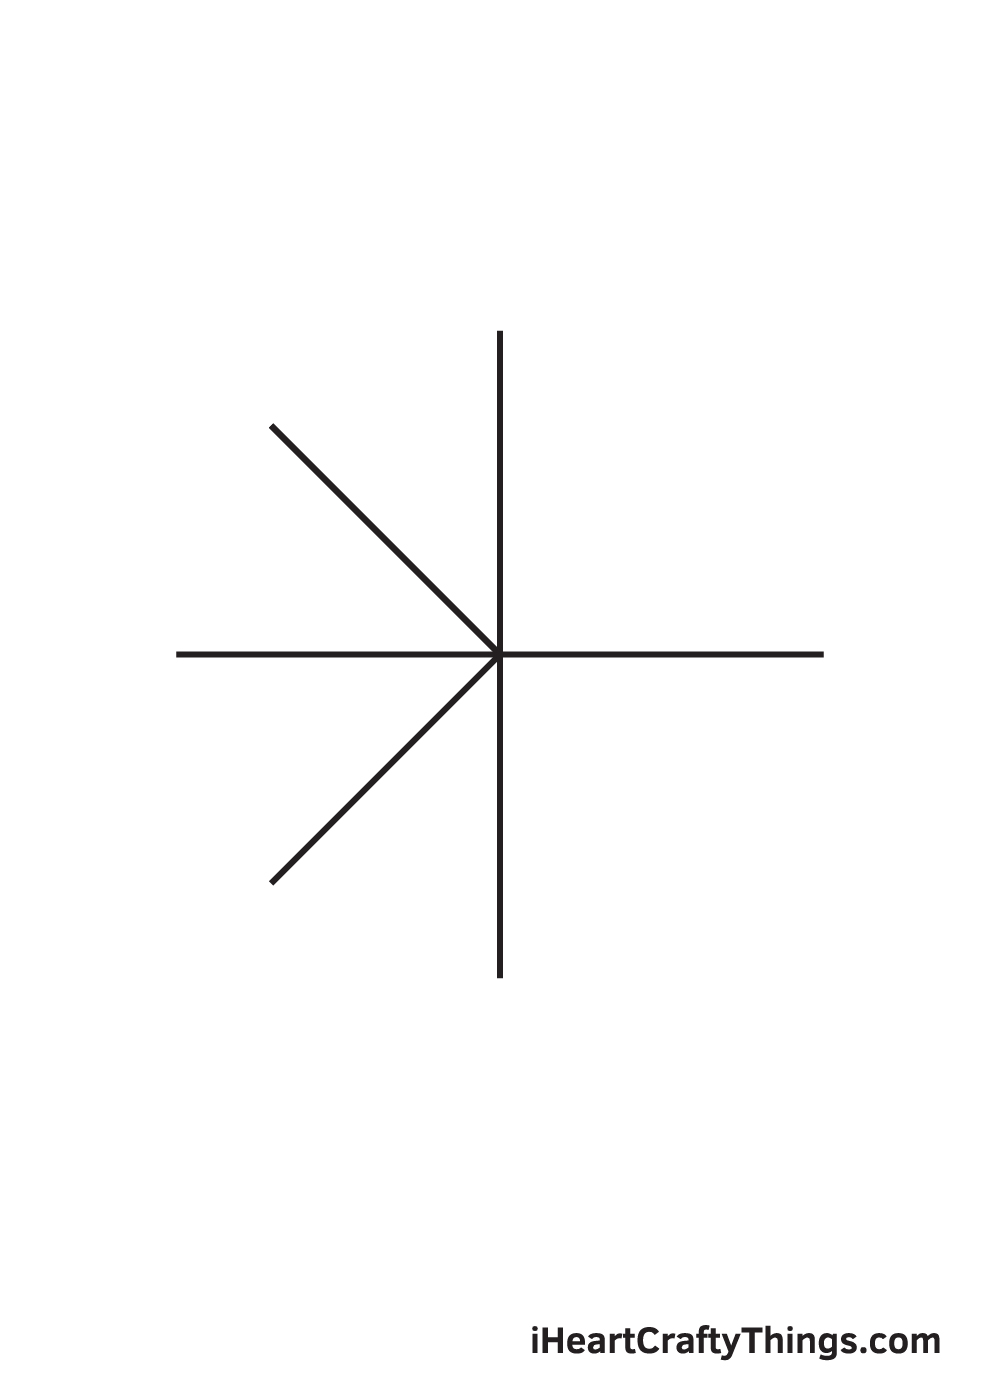
Repeat the previous step on the lower left side of the cross pattern. This forms another diagonal line in betwixt the left horizontal line and the bottom vertical line.
Proceed in mind that this diagonal line should have the same length to the first one that nosotros drew in the previous footstep.
Stride 5 — Draw a Diagonal Line on the Lower Right Side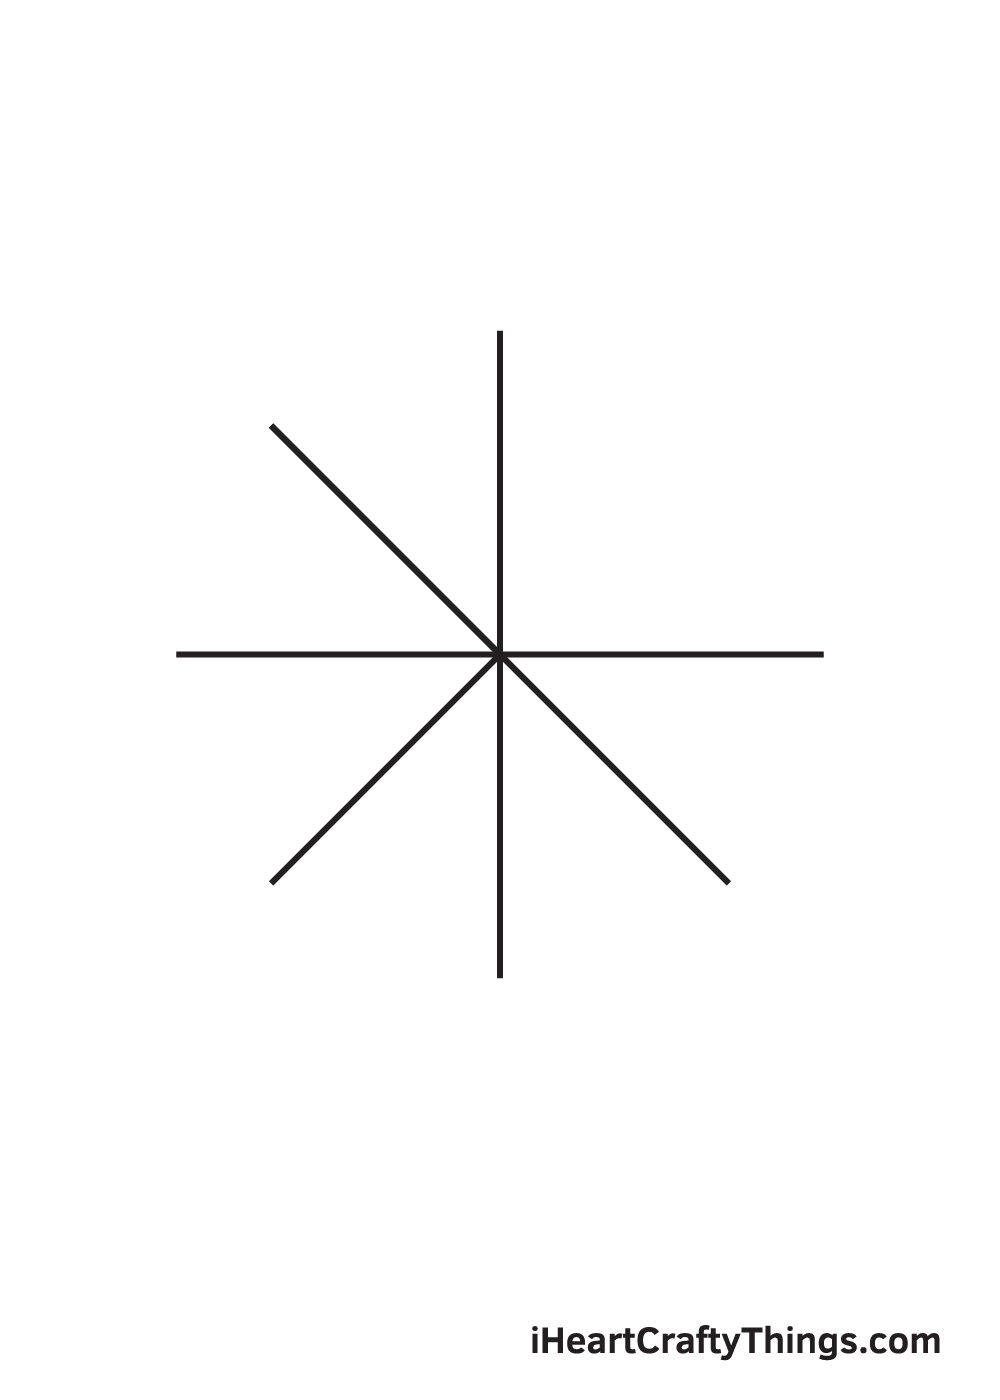
Draw another diagonal line in between the correct horizontal line and bottom vertical line. This diagonal line should be aligned with the line on the upper left side.
Thus, it should form a full-length diagonal line going from the upper left side to the lower right side of the cross blueprint.
Step 6 — Draw a Diagonal Line on the Upper Right Side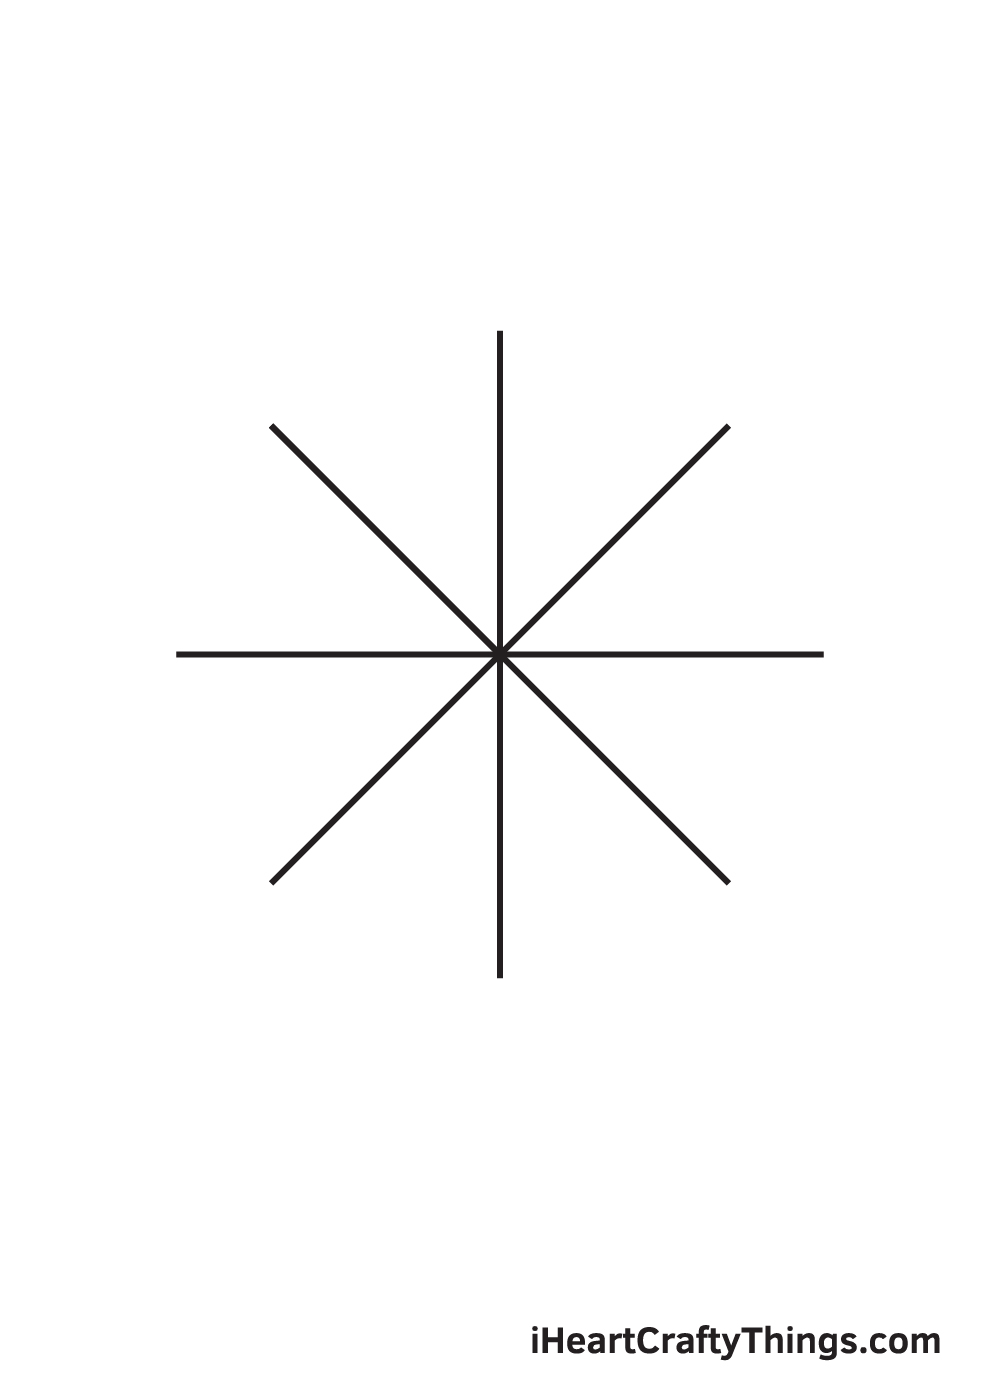
Describe another diagonal line in between the top vertical line and the right horizontal line. Similar to the other diagonal line, this line should exist aligned with the line on the bottom left side.
At this point, at that place should be an intersecting horizontal and vertical line forth with two diagonal lines. Thus, the guidelines for the perfect circle are at present complete.
Footstep seven — Trace an Outline of the Circumvolve on the Left Side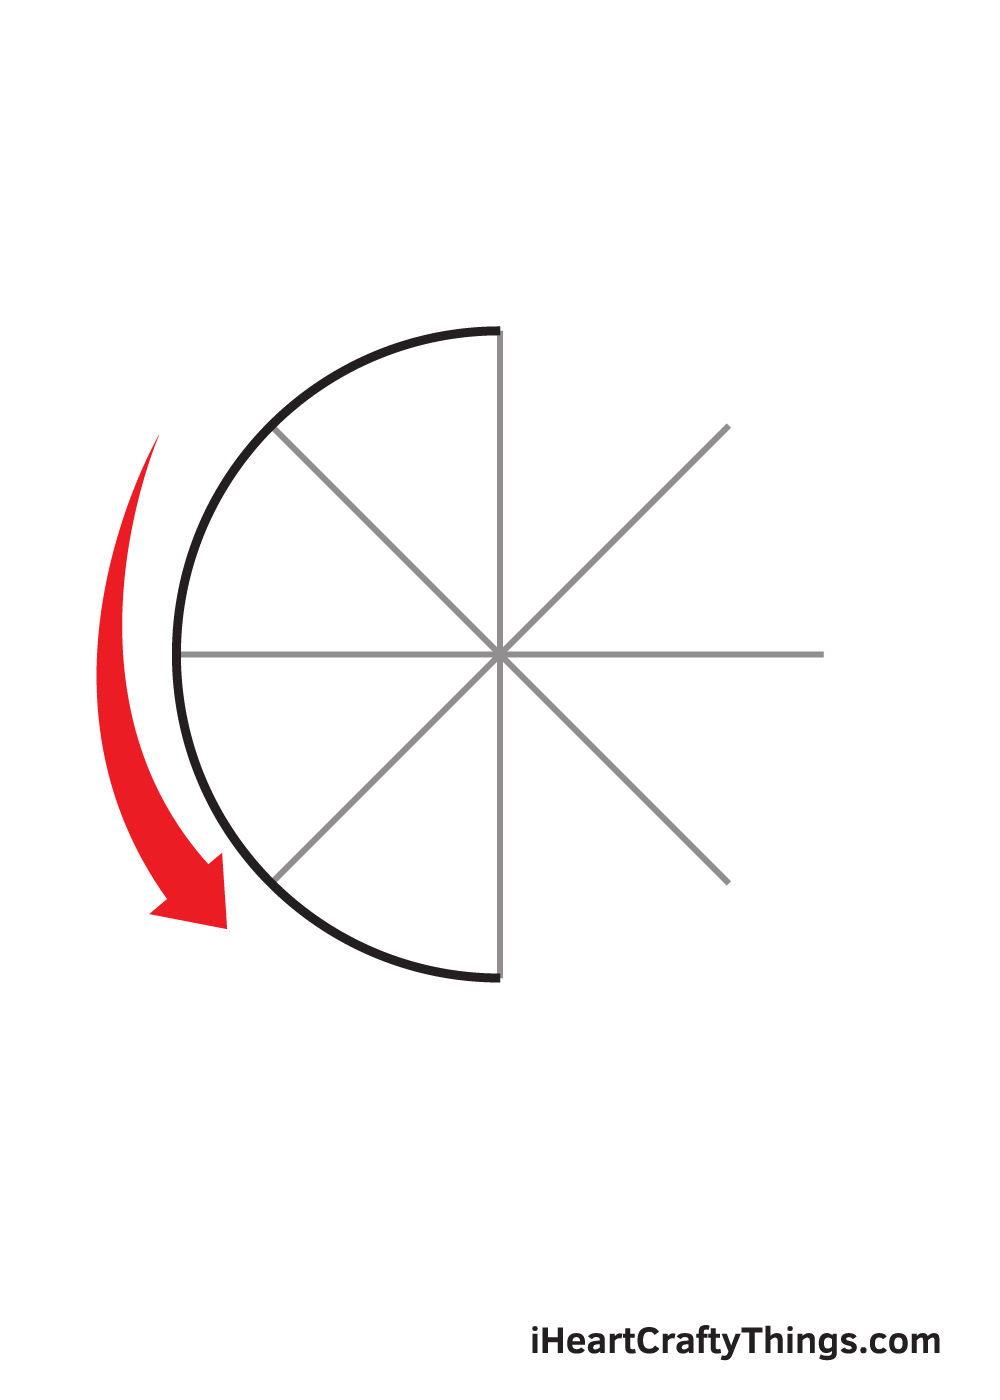
The purpose of the multiple intersecting lines that nosotros drew in the previous steps is to guide you in outlining a perfect circle shape.
This also helps make certain that the circle is proportion and symmetrical.
In this step, we volition be tracing a circle using the endpoints of the line as a guide. Starting from the summit, simply trace along from ane endpoint to another until the circumvolve is fatigued halfway through.
Step 8 — Afterwards, Complete the Outline of the Circle
Trace the other half of the circle on the right side, finalizing the course of the circumvolve shape.
Every bit yous can come across in the illustration, the perfect circle is finally complete!
Step 9 — At present, Erase the Lines to Refine the Circle Shape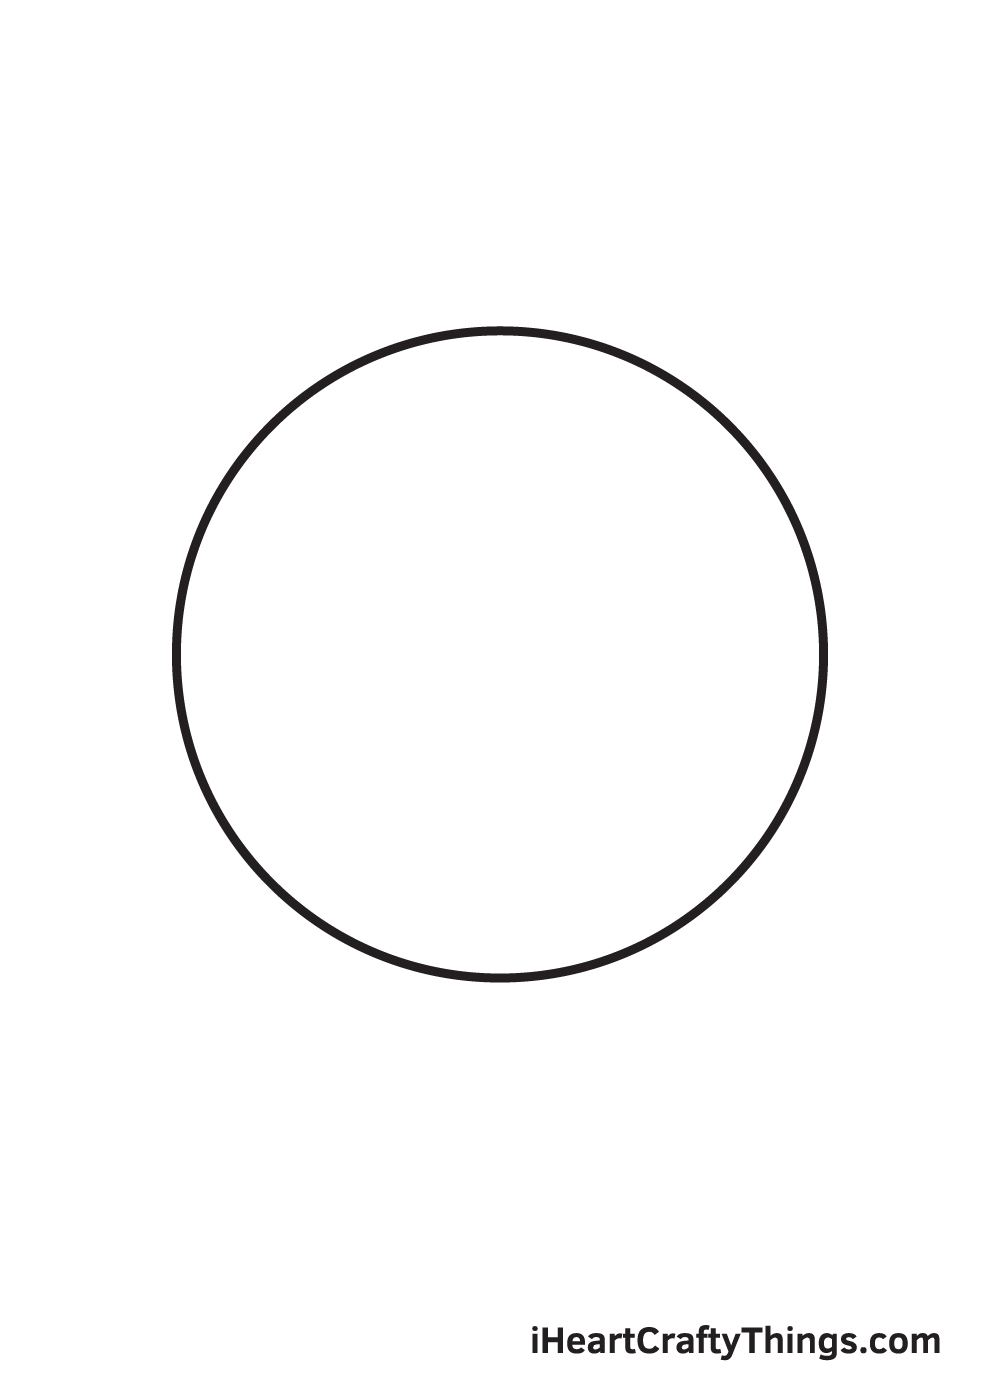
Now that we've successfully drawn a perfect circle, we no longer need the reference lines within the circumvolve.
Go rid of these lines using an eraser to shine upward the shape of the circumvolve. This besides helps keep your drawing neat and tidy.
Be careful when erasing the guidelines, y'all don't desire to accidentally erase any part of the circle.
After drawing a perfect circle, information technology's finally time for the most exciting part, which is coloring your drawing!
This is the part where yous can showcase your artistic skills, especially your ability to mix and match various colors.
As yous can see in the illustration, we've kept the colors plain and simple. We used a vibrant yellow to color the entire figure of the circle.
Feel free to use any color you like! You can fifty-fifty use more than one colour to create a multi-colored circumvolve shape! It'south all up to yous. After all, it's your work of art!
Have fun making the circle shape colorful!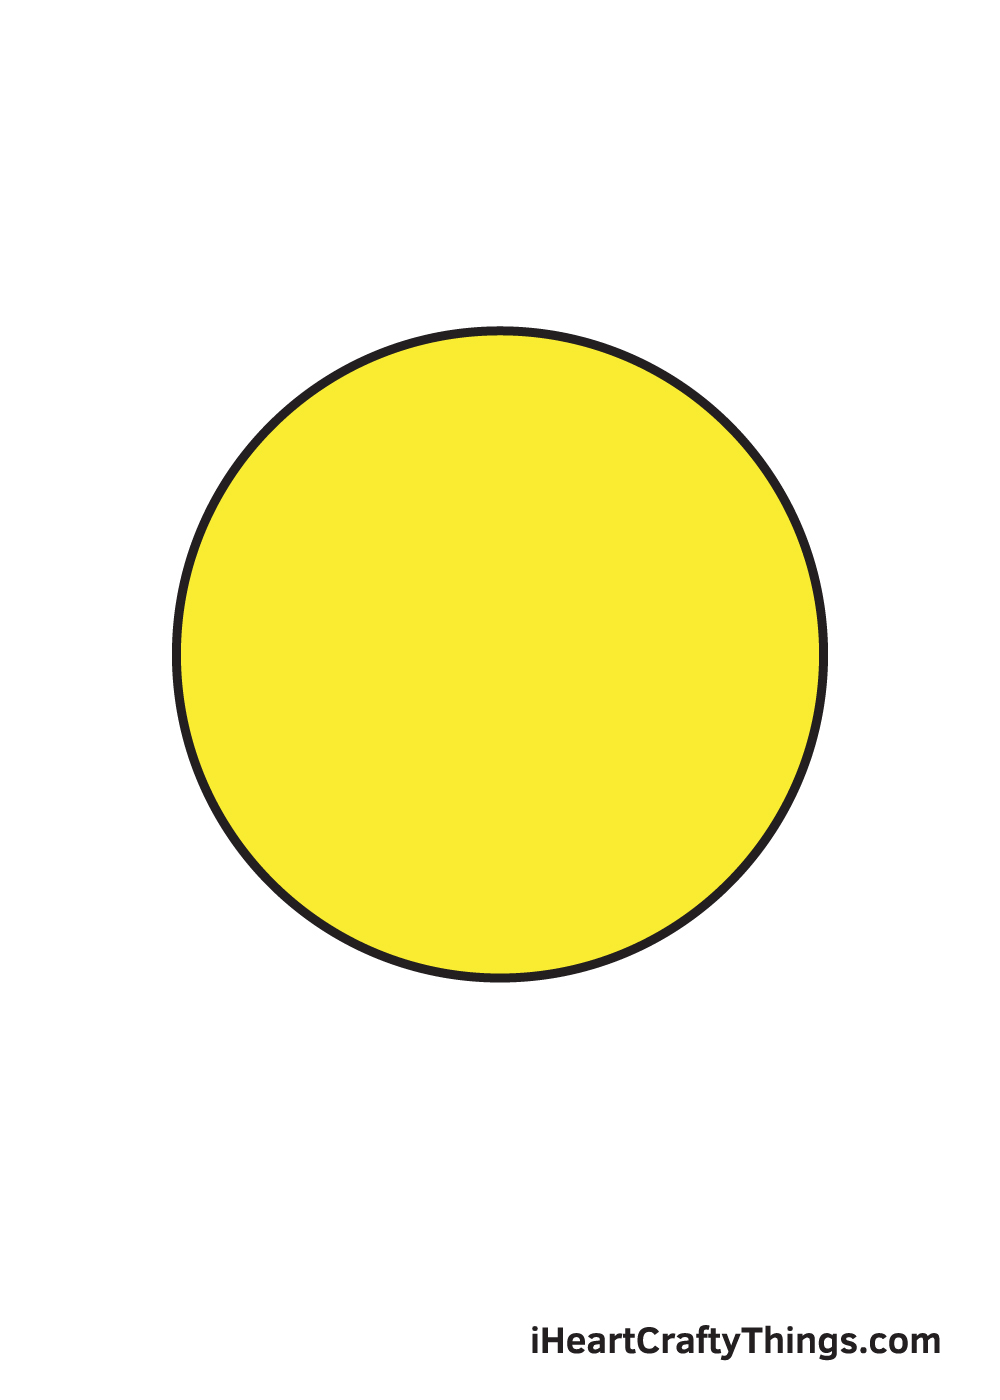
Your Circle Drawing is Consummate!
Nosotros hope you enjoy this step-by-step circle drawing tutorial. Now that y'all tin can draw a perfect circumvolve even without a compass, we're sure you will be able to use this important skill on much more complex drawings in the future.
Call back, all of our drawing tutorials are 100% free for y'all to apply as learning materials for your drawing activities.
We are regularly updating our "How to Describe" catalog and so brand sure you proceed checking back to continuously savour brand-new drawing tutorials.
As soon as you've finished drawing and coloring a perfect circumvolve, don't forget to testify off your masterpiece.
Have a picture show of your artwork and mail it on our Facebook page and on Pinterest. You lot've worked hard for it, so we're certain information technology'southward definitely worth sharing!
We would love to run into how your perfect circle turned out!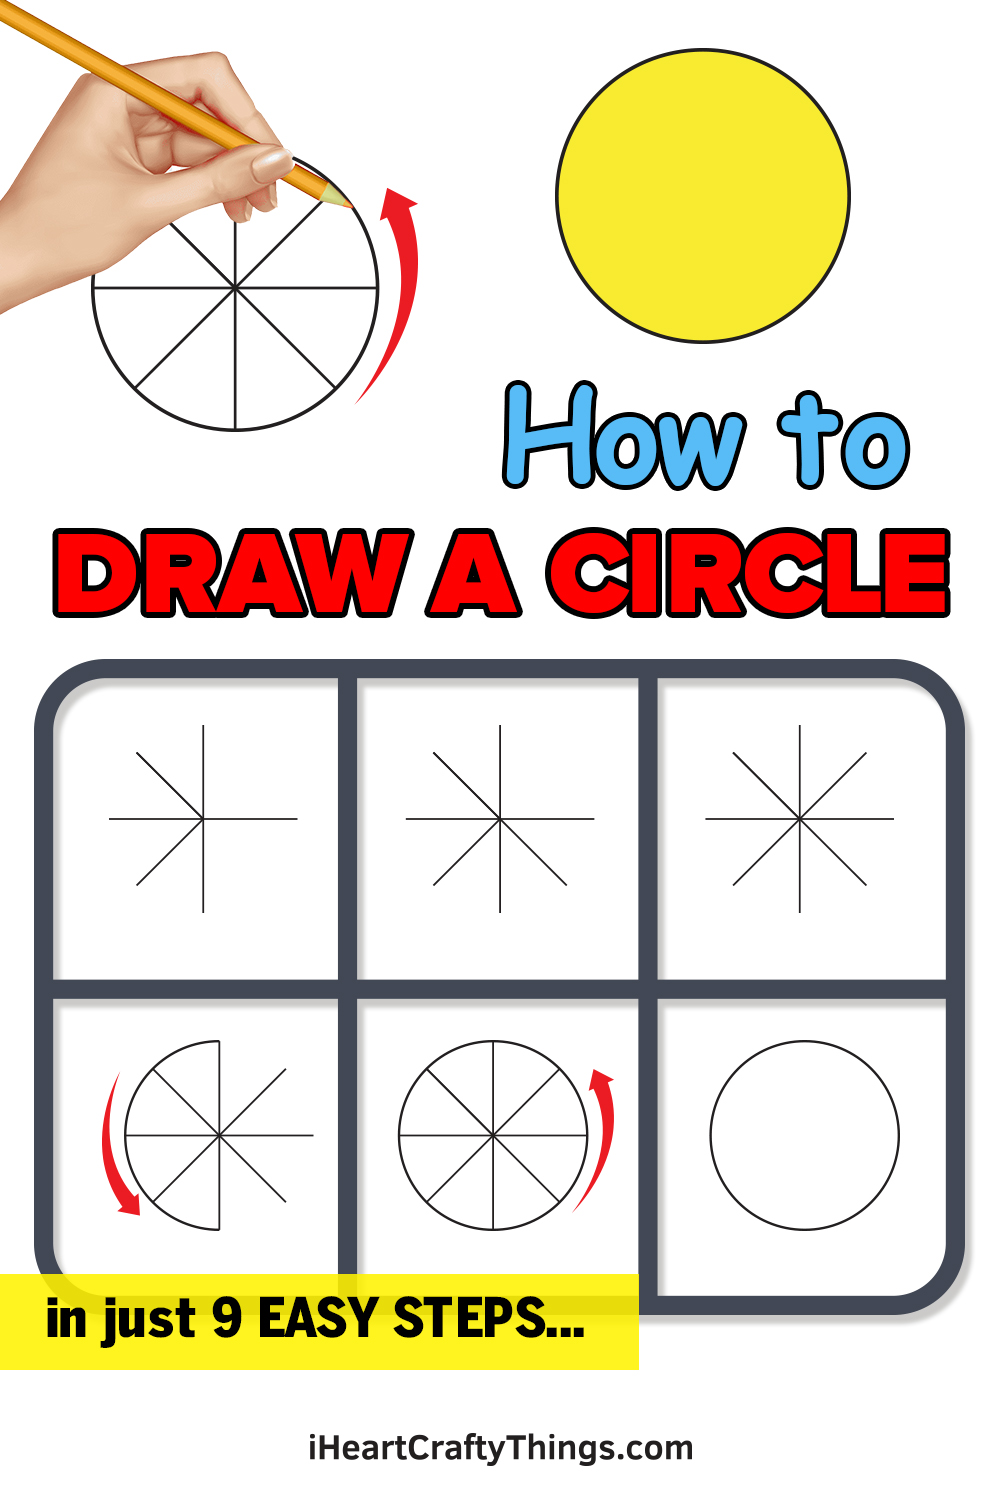
Source: https://iheartcraftythings.com/circle-drawing.html
0 Response to "First You Draw a Circle"
Post a Comment